Specific steps and precautions for on-site debugging of stage sound
On-site sound debugging is a huge system project, especially in the sound reinforcement system of large-scale performances, the tuner must have rich on-site experience, macro and clear system ideas, extraordinary courage and a steady state of mind, and meticulous, Rigorous work habits. Not only to pursue the correctness of each operation, but also to master the rhythm of the whole event, use your passion and solid professional skills to bring out your own style, and combine the characteristics of each program to mobilize the atmosphere of the scene.
Therefore, as a tuner, you must be familiar with the principles of acoustics and electricity, the types of music in various countries, and the structure of music. The most important thing is to be able to correctly understand the different emotions expressed by various music.

First of all, the tuner should arrive at the scene early, carefully check the line connection according to the system line drawing, and confirm that the line can work normally. Set the power amplifier input to the minimum, and set the input and output knobs of all peripheral devices to the 0 decibel position or the middle position. Turn on the power in the order from the front stage to the back stage (do not turn on the power amplifier first). After checking that all devices are properly powered, power on the power amplifier. At this time, properly open the gain control of the power amplifier, play a familiar CD, and adjust the mixer input level to the basic normal position. Slowly push up the mixer fader, listen to the sound from the speaker is normal, whether it is distorted, if not normal, immediately shut down and check.
After the system is basically normal, turn on the power of all devices, set the power level to the maximum, pull down the mixer output fader, connect the phase meter generator to the mixer input channel, turn on the phase meter power to adjust the output gain and mixer input Gain to the mixer indicator table is 0 dB. Slowly push up the mixer output fader and wait for the "pop" sound in the speaker to reach a sufficient loudness. Use a phase meter detector to check whether each speaker is in phase or consistent with the description of the speaker manual. It is best to turn off other speakers during detection to prevent interference, and it is more accurate to detect each one. If there is any abnormality, check whether the speaker cable is reversed or whether the system cable is reversed. Adjust it or change it and then check again.
If the combination of ultra-low frequency and full frequency is used at the same time, due to the existence of the crossover system and the installation location, there may be phase problems caused by cross-frequency interference or different delay times, so phase adjustment is required. The pink noise generator is connected to the input channel of the mixer, and the level is adjusted to the normal position. The phase meter test microphone is placed in the middle of the venue, forming an equilateral triangle with the speaker. Push up the mixer output fader, and check whether the spectrum analyzer screen has a valley point in the frequency band near the crossover frequency of the full-frequency and ultra-low frequency speakers. If so, increase the corresponding frequency band of the equalizer. If it cannot be improved, there is a phase problem. The appearance of the phase problem will directly affect the sound quality, and it is just solved with an equalizer. To solve the phase problem, it is necessary to adjust the phase angle of the crossover or the delay time between the speakers. When adjusting, pay attention to the spectrum analyzer display. First adjust the phase angle of the low-frequency divider to see if there is any improvement. If there is an improvement, determine the optimal value before adjusting the delay time. The adjustment of the delay time depends on the scene. If the low-frequency speaker is close to the seat, you need to adjust the delay of the bass, also looking at the spectrum analyzer screen, adjust the delay time to make the curve as flat as possible. Minimize phase interference.
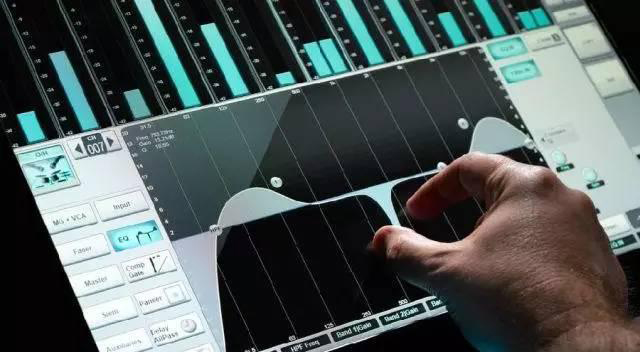
After making the above adjustments, the next step is to adjust the frequency response curve of the system. Put the test microphone of the spectrum analyzer at a certain position in the seating area, play the pink noise sound source, watch the spectrum analyzer display, and use the equalizer to correct the defective places. Put the test microphone in different places, change several positions, and adjust the balance repeatedly to make the frequency response curve of each area as straight as possible.
Next, debug the dynamic control device. If the compressor is connected in series with the chain, it is generally used as a protection system, so the main use is the limiting function of the compressor. According to personal needs, only one of the compressor setting methods is described here. The compressor can be set to pass-through (BYPASS), the input and output gain is set to 0 dB, the compression ratio is set to "infinity", and then sent from the mixer The pink noise signal is gradually increased. Observe the input level indicator of the power amplifier. When the clip indicator (CLIP) lights up. Connect to the pressure limiter, adjust and start
The level knob turns off the amplifier input clipping indication. Then increase the output of the mixer by 6 dB or let the output level indicator reach +6 dB, and then adjust the starting level a bit to make the power amplifier clipping indicator just start flashing.
After the preliminary adjustment of the system level according to the above steps, the microphone tone can be debugged. Adjust the level of a microphone without going through the mixer's microphone equalization process. The mixer channel fader is placed at 0 decibels (provided that the stage monitor signal is taken from the auxiliary output of the fader). Put the microphone in the main position on the stage, open the monitor output master control (AUX) and gradually increase the output level. After the microphone causes howling in a certain frequency band, fine-tune the AUX knob to stabilize the howling at a certain volume level, and then adjust the equalizer Press the corresponding frequency band knob to eliminate the howling in this frequency band, and then continue to increase the level. After the howling in another frequency band is generated, adjust the equalizer to eliminate it, and so on. The flat fader or AUX knob is adjusted to the normal position (such as 0dB), the microphone no longer produces howling, it means that the debugging is completed, restore the mixer fader to the starting position. This method is used to find howling points that easily cause resonance in the sound field, then appropriately reduce the level of the microphone channel, find someone to speak to the microphone, and then gradually increase the microphone volume to the normal position, if there is still howling, then pass Equalizer elimination.
After the debugging of the monitoring system howling point is completed, adjust the main expansion system in the same way. If the main expansion is a two-channel system, first close a channel, push the input fader of the mixer, and gradually increase the volume to find the howling point. After adjusting one channel, turn off this channel and adjust the other. After adjusting both sides, push the two channels up at the same time, check whether there are other howling points, and then eliminate them through the equalizer.
After the howling problem is resolved, perform sound debugging. Use a high-quality microphone as a reference to adjust the balance of the microphone input channel so that the microphone tone is as close as possible to the tone of the high-quality microphone used as a reference. After completing this step, the microphone timbre can generally meet the requirements of most actors, and then let the actors audition the microphone, and then make appropriate fine-tuning of the mixer channel balance according to the needs of the actors. After the original sound of the microphone is adjusted, you can add the reverb effect under the premise of need, use the effect to select the appropriate reverb type, turn on the corresponding AUX output of the mixer, and adjust the input level of the effect and the auxiliary output of the mixer Level, speak into the microphone, listen to the signal output to the effector is too large or too small, generally control this signal at 0 dB. Set the mixing ratio of the effector to 100%, and then gradually increase the output level of the effector to check whether the level of the output callback console is normal. If it is normal, set the output of the effector to a suitable position according to the specific needs of the actor .
The on-site debugging of the tuner should not only operate through rational technology and experience, but also from the perspective of sensibility and art, and match the characteristics of the performance to present high-quality live performances to the audience.